CROCHET HAYSTACK STITCH

CROCHET HAYSTACK STITCH-G6/4.00MM HOOK

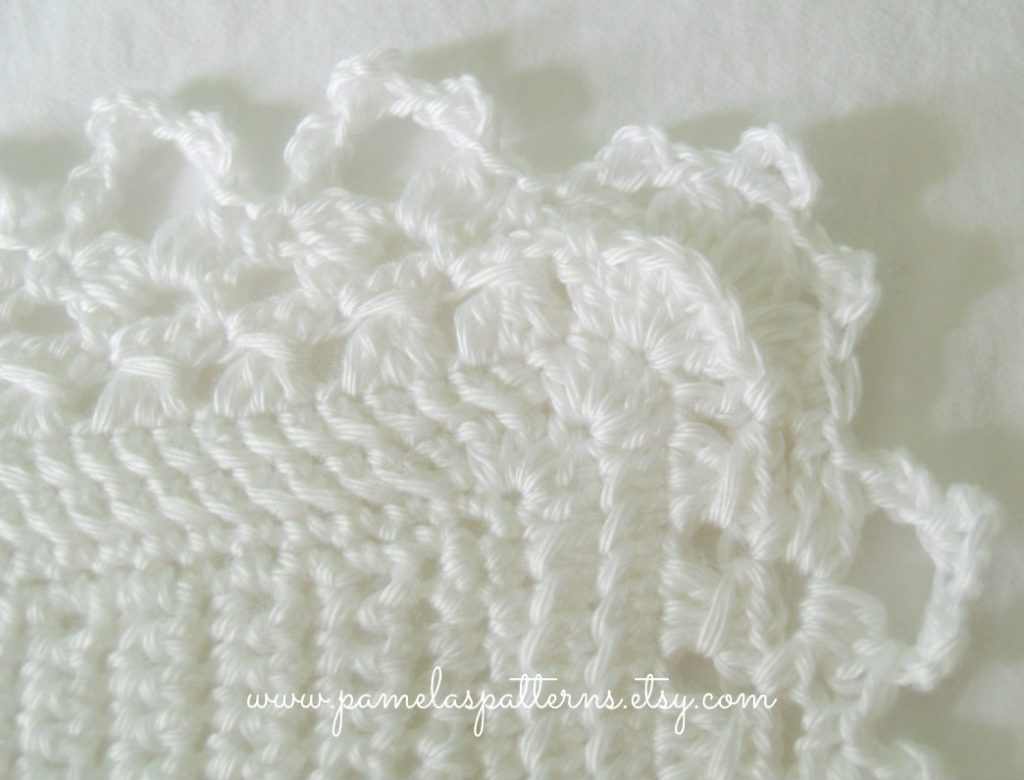
The lastest addition to The Lily Collection – Baptism Cross Blanket XIII afghan using the Haystack Stitch. Learning new crochet stitches are fun and designing in the art world of crochet is my thing! 

This crochet design pattern falls off the hook at a fast pace and the Haystack Stitch is easy, well defined and a repeat pattern. Welcome Baptism Cross Blanket XIII with your likes and shares which support me as an independent small business crochet designer.

The blanket is larger than my other designs at 47 inches length x 42 inches wide. Using the ethereal quality of Caron Simply Soft yarn and a G6/4.00mm crochet hook makes this design come alive. All my Cross designs are special to me and I know you will love this one too.
Pattern changes

So, you want to alter the current crochet pattern you are working on. You desire to change a stitch, add rows or rounds and change border design. Someone who does this is often called a DESIGNER. If you have ideas like these pursue them to the end! Create something that is uniquely you. Personalizing for someone you care about is a good thing.

CAUTION HOWEVER KNOW THAT YOU ARE ENTERING DANGEROUS TERRITORY

The simplest to more complex changes you want to make will effect the outcome of the pattern design you are spring-boarding from. Where will those changes likely take you? Will you put in a great deal of effort only to find out you will be frogging the entire project.

Think and plan out what you want to change, so you succeed or identify early on what to scrap. A Designer maps out concepts and changes throughout a design.

Stitches take up space both in width and height. A single crochet is short, a double crochet twice as tall and a treble even taller though all three might take up the same width space, they will not in height. If your working rounds, you will be adding a different amount of stitches so that your corners will lay flat….so if you change a round from sc to dc stitch you just changed stitch count.

Decisions decisions decisions I say MAKE them, but think about how that change may alter what comes next.

MOST OF ALL HAVE FUN AND ALWAYS CREATE

Loading

The start of a Pie Crust Crochet Obsession – part 5


“see POST Part-4 enhancements made to the pattern instructions of Cherry Pie Motif”

CROCHET CHERRY PIE CRUST

A Pie isn’t a PIE without a CRUST, right?! So, here we go to put the Cherry Pie together with its Cherry topping (Motif) and Pie Crust bottom. Check out additional stitches added for this next phase of the Crochet Cherry Pie. Don’t forget to follow the Magic Ring link to a video to see how this is done.

MATERIALS LIST

Medium-4 Yarn, an ounce or so of each color.

MC: Red (Cherries) and CC: White (Crust)

Crochet Hook: F/5 3.75mm

Stitch markers

Tapestry needle

SPECIAL STITCHES

Magic Ring: Form a ring with yarn; leaving loose end about 6 inches long, insert hook in center of ring and under yarn coming from the ball. YO and draw through lp on hook: ch made. Ch 3 (counts as first dc); work as many dc in ring as specified in pattern; join with slip st to top of beg ch-3. Pull the 6 inch tail to close the center of work. This foundation start can also be called adjustable ring because the size can easily accomodate many stitches. Click on Magic Ring to be taken to a Red Heart Video on how to make this foundation beginning.

Picot: Ch 3, slip st in first ch made.

5-dc-Popcorn (Pop): Work 5 dc in specified stitch; drop lp from hook, insert hook front to back in the top of the first dc made, pick up dropped lp, and draw through lp on hook; ch 1 to secure stitch. Normally you would use a ch 1 to secure the stitch, in this pattern I am using 2 chs. Note, all popcorns will be gathered to pop to the front of the motif.

Shell (Shell): Work (sc, hdc, dc, tr, dc, hdc, sc) in specified stitch.

V-Stitch (V-St): Work (dc, ch 2, dc) in specified stitch.

ABBREVIATIONS

beg: beginning, BPdc: back post double crochet, CC: contrasting color, ch: chain, dc: double crochet, hdc: half double crochet, lp(s): loop(s), MC: main color, Pop: popcorn, Rep: repeat, Rnd: round, RS: right side, sc: single crochet, slip st: slip stitch, sp(s): space(s), st(s): stitch(es), tr: treble crochet, YO: yarn over


PIE CRUST INSTRUCTION

Rnd 1 RS: With CC, Magic Ring, ch 3 (counts as dc now and throughout), work 11 more dc in ring, slip st into beg dc, ch 3, do not turn. (12 dc)

Rnd 2: Work dc in same st as beg ch-3, *2 dc in each dc; rep from * around, slip st into beg dc, ch 3. (24 dc)

Rnd 3: Work *2 dc in next dc, dc in next dc; rep from * around, slip st into beg dc, ch 3. (36 dc)

Rnd 4: Work dc in next dc, *2 dc in next dc, dc in each of the next two dc; rep from * around, slip st into beg dc, ch 3. (48 dc)

Rnd 5: Work dc in each of the next 2 dc, *2 dc in next dc, dc in each of the next three dc; rep from * around, slip st into beg dc, ch 3. (60 dc)

Rnd 6: Work dc in next dc, *2 dc in next dc, dc in each of the next two dc; rep from * around, slip st into beg dc. (80 dc)

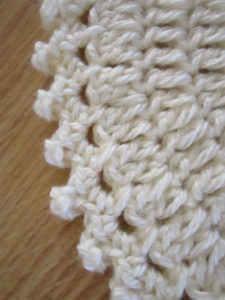
Rnd 7: *Ch 3, skip next dc, sc in next dc; rep from * around, ending with slip st into beg ch-3 and ch-3 sp. (40 ch-3 sps)

Rnd 8: Ch 1, *(sc, picot, sc) in each ch-3 sp around; rep from * around, ending with slip st into beg sc. Fasten off if stopping here or continue to Rnd 9 and Rnd 10 to a Gorgeous Granny Square. (40 picots)


FINISHING INSTRUCTION

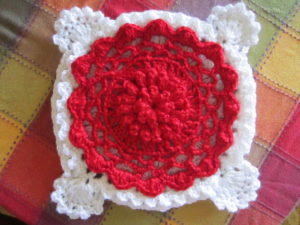
Tighten up sliding loop and weave in ends with tapestry needle. With right sides facing, lay Crust on surface in front of you, center Cherry Pie Motif on top of Crust, sew together.

Block if desired. Taking time to block your finished piece will enhance the project by opening up the stitch pattern, evening out lacework and creating straight, even edges, especially as your tension naturally loosens and tightens as you crochet.


CHERRY PIE GRANNY SQUARE

Rnd 9 RS: Ch 4 (counts as tr), 6 more tr in same st, [(ch 3, BPdc around next sc of Rnd 7) 8 times more, ch 3, 7 tr in next sc of Rnd 8] rep between [ ] 3 times more around, ending with ch 3, slip st into 4th ch of beg ch-4.

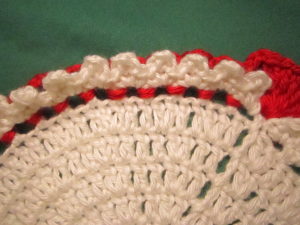
I used a contrasting color in the picture above to better show the BPdc behind the Picot row.

If you pull the picot towards you while working the BPdc it will be easier to complete.

Rnd 10: [*(Picot, sc in next tr) 5 times more, ch 3, (skip next dc, 3 sc in next ch-3 sp) 7 times more, ch 3, sc in next tr)] repeat between [ ] 3 times more around, ending with slip st into 4th ch of beg tr. Fasten off. Follow Finishing Instruction.


Click on this link to be taken to the Free Pattern page to get the complete pattern.

I hope you will share what you make using my PIE CRUST OBSESSION inspiration!


Loading

The start of a Pie Crust Crochet Obsession – part 4


“see enhancements made since first publication”

BREAKING DESIGNER RULE NUMBER ONE

ALWAYS write down the crochet hook size you are playing with right from the start!

“I must have needed that hook somewhere else, right?”

You may get distracted for several days (or weeks) from your design process (like I did) and when you come back to your project you’ll be scratching your head like me today on what hook I was using! If you have several crochet hooks the same size – leave it with the project – I did none of these things. Also, we could talk about tension changes too right now but I won’t! 

This is Part 4 of my Pie Crust Obsession. If you have been following along we will finish the top of the Pie. You don’t have to use the color I chose, I just thought it fitting for the holidays coming. Most of all I hope you have fun playing in C R O C H E T!


CROCHET CHERRY PIE

MATERIALS LIST

Medium-4 Yarn

MC: Red (Cherries)

Crochet Hook: F/5 3.75mm

Stitch markers

Tapestry needle

SPECIAL STITCHES

Magic Ring: Form a ring with yarn; leaving loose end about 6 inches long, insert hook in center of ring and under yarn coming from the ball. YO and draw through lp on hook: ch made. Ch 3 (counts as first dc); work as many dc in ring as specified in pattern; join with slip st to top of beg ch-3. Pull the 6 inch tail to close the center of work. This foundation start can also be called adjustable ring because the size can easily accomodate many stitches. Click on Magic Ring to be taken to a Red Heart Video on how to make this foundation beginning.

5-dc-Popcorn (Pop): Work 5 dc in specified stitch; drop lp from hook, insert hook front to back in the top of the first dc made, pick up dropped lp, and draw through lp on hook; ch 1 to secure stitch. Normally you would use a ch 1 to secure the stitch, in this pattern I am using 2 chs. Note, all popcorns will be gathered to pop to the front of the motif.

V-Stitch (V-St): Work (dc, ch 2, dc) in specified stitch.

Shell (Shell): Work (sc, hdc, dc, tr, dc, hdc, sc) in specified stitch.

ABBREVIATIONS

beg: beginning, ch: chain, dc: double crochet, lp: loop, MC: main color, pop: popcorn, Rnd: round, RS: right side, sc: single crochet, slip st: slip stitch, sp(s): space(s), tr: treble crochet, YO: yarn over

CHERRY PIE MOTIF PATTERN INSTRUCTIONS

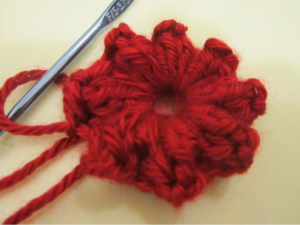
Rnd 1 RS: With MC, Magic Ring, ch 3 (counts as first dc now and throughout), 4 more dc in ring, drop lp from hook, insert hook front to back in the top of the first dc made, pick up dropped lp, and draw through lp on hook (first pop made), ch 2, (pop, ch 2) 7 times more in ring, slip st to first pop, slip st into ch-2 sp, do not turn. (8 pops)

Pull 6 inch tail to close center of motif and secure.
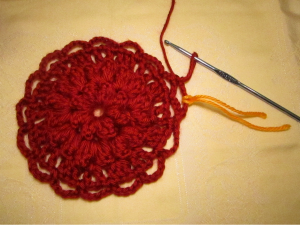
Rnd 2: *In ch-2 sp, (pop, ch 2) again, ch 3; rep from * around, ending with slip st into beg pop and ch-2 sp. (16 pops)

Rnd 3: Ch 5 (counts as dc and ch 2 sp), dc in same sp, *ch 1, 3 dc in next ch-3 sp, ch 1, V-st in next ch-2 sp; rep from * around, ending with ch 1, slip st in 3rd ch of beg ch-5. (8 V-sts, 24 dc)

Tip: Marking with a stitch marker to keep track of rounds is a great idea. A simple contrasting yarn color works!
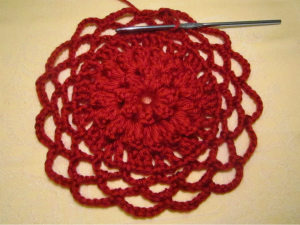
Move the stitch marker(s) to each new round.

Rnd 4: *Ch 5, sc in next ch-1 sp; rep from * around, ending with slip st into first ch of beg ch-5 and 3 more times in ch-5 sp. Place a stitch marker in first ch-5 sp. (16 ch-5 sps)

Rnd 5: *Ch 6, sc in next ch-5 sp; rep from * around, ending with slip st into first ch of beg ch-6 and 4 more times in ch-6 sp. Move stitch to first ch-6 sp. (16 ch-6 sps)

Rnd 6: *Ch 7, sc in next ch-6 sp; rep from * around, ending with sc into the fourth slip st of ch-6 sp. Remove stitch marker. (16 ch-7 sps)

Remove stitch marker(s).

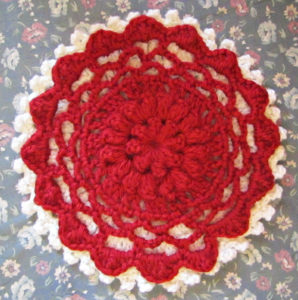
Rnd 7: Work (sc, hdc, dc, tr, dc, hdc, sc) in ch-7 sp (first Shell made); *shell in next ch-7 sp; rep from * around, ending with slip st into beg sc. Fasten off. Weave in all ends (16 Shells)

That’s the top of our pie. Enjoy playing with this pattern,

would love to hear from you on what pie obsession your having.


The bottom of our Pie Crust will be coming soon

stay tuned for The start of a Pie Crust Crochet Obsession – part 5


Errata: Rnd 1 added “MC”, Rnd 2 added “and into ch-2 sp”, Updated Rnd(s) 4, 5, 6 and 7 for more clarification.

Loading

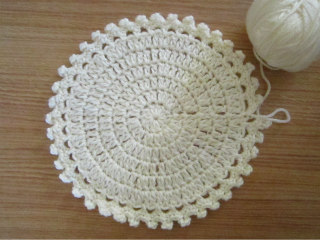
The start of a Pie Crust Crochet Obsession – part 2

I saw this pie crust and started thinking about creating a Granny Square in C R O C H E T. 

As a crochet designer you have many resources like books and that’s where I started.

I hope you will follow my journey by checking back to see how I made my CROCHET PIE CRUST !


Loading

The start of a Pie Crust Crochet Obsession

Recently, I became obsessed with PIE CRUSTS! On Pinterest there are some of the most gorgeous designs I have ever seen!

If you squint your eyes can you see C R O C H E T? Can you see making something as gorgeous out of yarn? Let me show you what I made.


Loading

Materials I like to use when designing crochet projects with you in mind

PATONS Silk Bamboo Yarn 70% Bamboo/30% Silk hand wash, dry flat, do not bleach, do not iron, do not dry clean
CARON-Simply Soft Yarn ♥♥♥♥ Yarn 100% acrylic machine wash gentle, tumble dry low
AUNT LYDIA’S Crochet Cotton ♥♥♥♥ Thread 100% mercerized cotton machine washable warm water, no bleach, roll in towel to release excess water, block
LION BRAND Wool-Ease Yarn wool and acrylic blend machine washable for easy cleaning
BERNAT Blanket chenille-style yarn 100% polyester machine washable and dryable
RED HEART—Super Saver Yarn 100% acrylic machine wash and dry
BERNAT Softee Baby Yarn 100% acrylic machine washable and dryable
BERNAT Baby Sport ♥♥♥♥ Yarn 100% acrylic machine washable and dryable
BERNAT Handicrafter Crochet Thread 100% acrylic machine washable and dryable
RED HEART ♥♥♥♥ Bamboo Crochet Thread 100% Viscose from Bamboo machine wash gentle cycle, warm water, no bleach, rinse well, roll in towel to release excess water, block
PATONS ♥♥♥♥ Grace Thread 100% mercerized cotton hand wash. Lay flat to dry, no bleach, roll in towel to release excess water, block, do  not iron or press, do not dry-clean
BERNAT MATRIX (Railroad Yarn) Thread 62% nylon, 38% polyester machine washable and dryable
LION BRAND Metallic yarn 100% acrylic hand wash, lay flat to dry
NATURALLY CARON Yarn 75% microdenier acrylic, 25% merino wool machine washable warm water, gentle cycle, machine dry low, delicate cycle
PEACHES & CREAM Thread 100% USA grown cotton machine washable warm water, gentle cycle, machine dry low, delicate cycle, no bleach
LILY SUGAR’N CREAM Thread 100% USA grown cotton machine wash or hand wash in cold water, mild soap, no bleach, roll in towel to remove excess water, tumble dry low/delicate setting, colors may run wash separately
PREMIER Cotton Fair Thread 52% cotton, 48% acrylic machine washable
LION BRAND Fun Fur 100% polyester hand wash, fluff in dryer

A yarn or thread will convey itself to a design and these are some of my fav’s! ♥♥♥♥

Loading

Crochet and Cooking

Crochet and Cooking

Crochet Designer cooking is the same as a head chef, I think. Truly, that is what I am a chef and hook winder! Creating a meal menu with all its components is intricate. From planning the Menu, Purchasing ingredients, Prepping and Timing, all of the components as intricate as laying out a new crochet design. A chef will anticipate your first bite. A crochet designer will anticipate your first glimpse! Both of us anxiously await your reaction!

As a crochet designer, I ask myself many questions like: what thread or yarn, color or colors, technique of stitches to achieve texture, what will the texture be?

Very slowly and sometimes painstakingly, the form I desire begins to take shape. The numbers work out. The vision becomes a reality. My joy builds and my heart beats faster, driving the hook in my hand to the finish line. The finished piece becomes a reality.

Your comments and social sharing goes a long way to boost the inner joy of the designer, me, and I thank you. Many of my followers have written such lovely things about their crochet experience making one or more of my designs. See more on my website Pamela Veller Crochet and Pamela’s Patterns Etsy Shop.


Loading