“see POST Part-4 enhancements made to the pattern instructions of Cherry Pie Motif”
CROCHET CHERRY PIE CRUST
A Pie isn’t a PIE without a CRUST, right?! So, here we go to put the Cherry Pie together with its Cherry topping (Motif) and Pie Crust bottom. Check out additional stitches added for this next phase of the Crochet Cherry Pie. Don’t forget to follow the Magic Ring link to a video to see how this is done.
MATERIALS LIST
Medium-4 Yarn, an ounce or so of each color.
MC: Red (Cherries) and CC: White (Crust)
Crochet Hook: F/5 3.75mm
Stitch markers
Tapestry needle
SPECIAL STITCHES
Magic Ring: Form a ring with yarn; leaving loose end about 6 inches long, insert hook in center of ring and under yarn coming from the ball. YO and draw through lp on hook: ch made. Ch 3 (counts as first dc); work as many dc in ring as specified in pattern; join with slip st to top of beg ch-3. Pull the 6 inch tail to close the center of work. This foundation start can also be called adjustable ring because the size can easily accomodate many stitches. Click on Magic Ring to be taken to a Red Heart Video on how to make this foundation beginning.
Picot: Ch 3, slip st in first ch made.
5-dc-Popcorn (Pop): Work 5 dc in specified stitch; drop lp from hook, insert hook front to back in the top of the first dc made, pick up dropped lp, and draw through lp on hook; ch 1 to secure stitch. Normally you would use a ch 1 to secure the stitch, in this pattern I am using 2 chs. Note, all popcorns will be gathered to pop to the front of the motif.
Shell (Shell): Work (sc, hdc, dc, tr, dc, hdc, sc) in specified stitch.
V-Stitch (V-St): Work (dc, ch 2, dc) in specified stitch.
ABBREVIATIONS
beg: beginning, BPdc: back post double crochet, CC: contrasting color, ch: chain, dc: double crochet, hdc: half double crochet, lp(s): loop(s), MC: main color, Pop: popcorn, Rep: repeat, Rnd: round, RS: right side, sc: single crochet, slip st: slip stitch, sp(s): space(s), st(s): stitch(es), tr: treble crochet, YO: yarn over
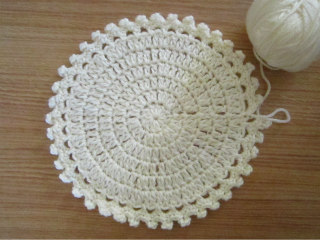
PIE CRUST INSTRUCTION
Rnd 1 RS: With CC, Magic Ring, ch 3 (counts as dc now and throughout), work 11 more dc in ring, slip st into beg dc, ch 3, do not turn. (12 dc)
Rnd 2: Work dc in same st as beg ch-3, *2 dc in each dc; rep from * around, slip st into beg dc, ch 3. (24 dc)
Rnd 3: Work *2 dc in next dc, dc in next dc; rep from * around, slip st into beg dc, ch 3. (36 dc)
Rnd 4: Work dc in next dc, *2 dc in next dc, dc in each of the next two dc; rep from * around, slip st into beg dc, ch 3. (48 dc)
Rnd 5: Work dc in each of the next 2 dc, *2 dc in next dc, dc in each of the next three dc; rep from * around, slip st into beg dc, ch 3. (60 dc)
Rnd 6: Work dc in next dc, *2 dc in next dc, dc in each of the next two dc; rep from * around, slip st into beg dc. (80 dc)
Rnd 7: *Ch 3, skip next dc, sc in next dc; rep from * around, ending with slip st into beg ch-3 and ch-3 sp. (40 ch-3 sps)
Rnd 8: Ch 1, *(sc, picot, sc) in each ch-3 sp around; rep from * around, ending with slip st into beg sc. Fasten off if stopping here or continue to Rnd 9 and Rnd 10 to a Gorgeous Granny Square. (40 picots)
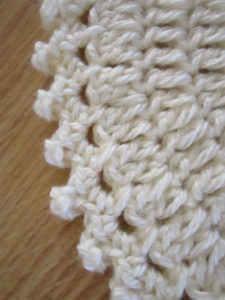
FINISHING INSTRUCTION
Tighten up sliding loop and weave in ends with tapestry needle. With right sides facing, lay Crust on surface in front of you, center Cherry Pie Motif on top of Crust, sew together.
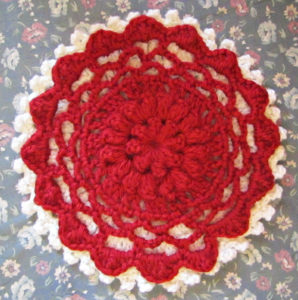
Block if desired. Taking time to block your finished piece will enhance the project by opening up the stitch pattern, evening out lacework and creating straight, even edges, especially as your tension naturally loosens and tightens as you crochet.
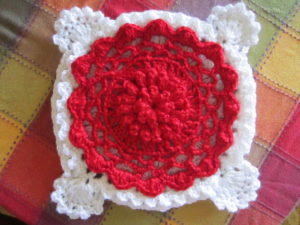
CHERRY PIE GRANNY SQUARE
Rnd 9 RS: Ch 4 (counts as tr), 6 more tr in same st, [(ch 3, BPdc around next sc of Rnd 7) 8 times more, ch 3, 7 tr in next sc of Rnd 8] rep between [ ] 3 times more around, ending with ch 3, slip st into 4th ch of beg ch-4.
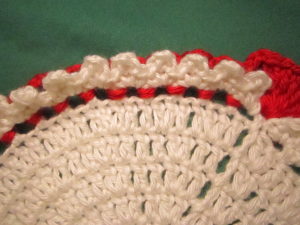
I used a contrasting color in the picture above to better show the BPdc behind the Picot row.
If you pull the picot towards you while working the BPdc it will be easier to complete.
Rnd 10: [*(Picot, sc in next tr) 5 times more, ch 3, (skip next dc, 3 sc in next ch-3 sp) 7 times more, ch 3, sc in next tr)] repeat between [ ] 3 times more around, ending with slip st into 4th ch of beg tr. Fasten off. Follow Finishing Instruction.
Click on this link to be taken to the Free Pattern page to get the complete pattern.
I hope you will share what you make using my PIE CRUST OBSESSION inspiration!
![]()

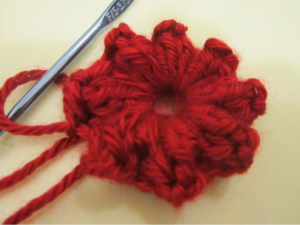 Pull 6 inch tail to close center of motif and secure.
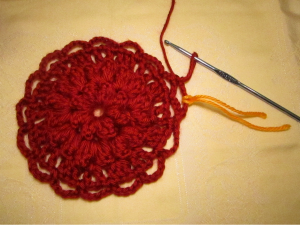 Tip: Marking with a stitch marker to keep track of rounds is a great idea. A simple contrasting yarn color works!
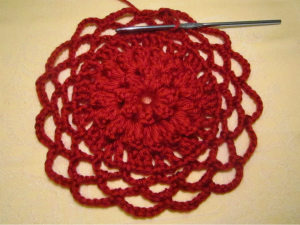 Remove stitch marker(s).
